20 Best Sites with High Quality Free Stock Photos

In today's online business world, tons of people have a need for quality free stock photos for their blogs, company websites, and everything in between.

Unfortunately, there are still a lot of businesses who are settling for the corny stock photo of yesteryear, either because they don't know their options or think they are too hard to find.

That's where the good news comes in: good stock photos don't have to be expensive or hidden deep in the crevices of the internet. In our digital age, there's plenty of solid material out there - if you know where to look. Read for more good news? We have your back, and have taken the hassle out of finding these stellar stock images.

We're confident that this collection of resources will help you find exactly what you're looking for, whether it's adorable animals, minimalist interior design, and anything in between.

free stock photos

20 of the Best Sites to Download Royalty Free Stock Photos

1. Negative Space


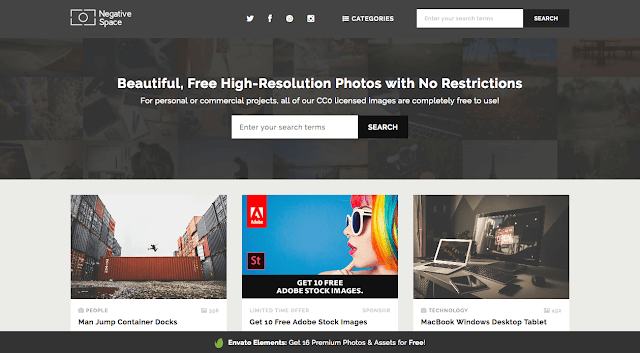
One of the best things about Negative Space is that they are constantly updating their free stock photos every week. With Negative Space, you never need to worry about copyright restrictions, so you can use them for your project without having to jump through hoops.

Negative Space has a large selection to choose from, and the interface is very user-friendly. It's easy to sort through the photos in order to find exactly what you need.

2. Death to the Stock Photo


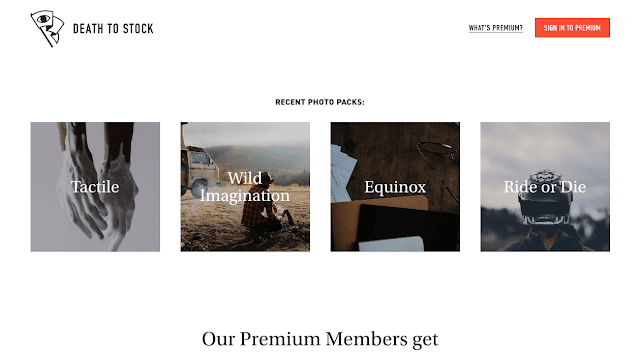
The founders of Death to Stock are dedicated to making beautiful photos more accessible. They knew how important it is for those running blogs and online businesses to not spend all of their profit on images for their websites.

The format is simple: just give them your email to get a new bundle of great stock pictures monthly, then just use the ones that apply to your current project. Easy!

For businesses with some extra funds to invest, Death to Stock has an affordable Premium membership which gives you access to their entire library of photos (instead of just the pre-selected ones they send), plus some of the profits from the membership are used to further the resource by financing photographers and their projects.

3. Picjumbo


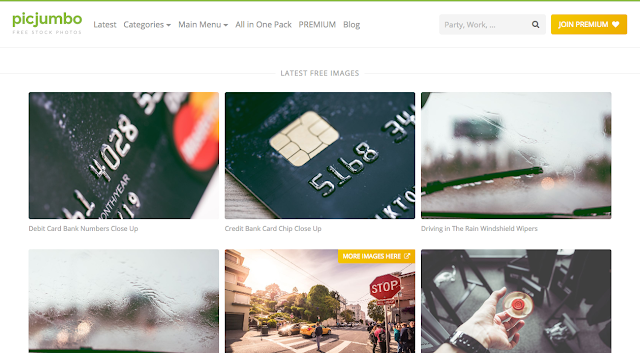
Picjumbo is unique in that all of the photos come from a sole photographer, Viktor, who shares his photos from his home in the Czech Republic.

He updates the selection of photos really frequently, so there is always a fresh batch of high-quality graphics to download. To take it a step further, Viktor offers affordable paid packages for businesses that use stock images frequently. He also has a nifty plugin for the Photoshop and Sketch programs for just under 8 bucks.

4. Stokpic


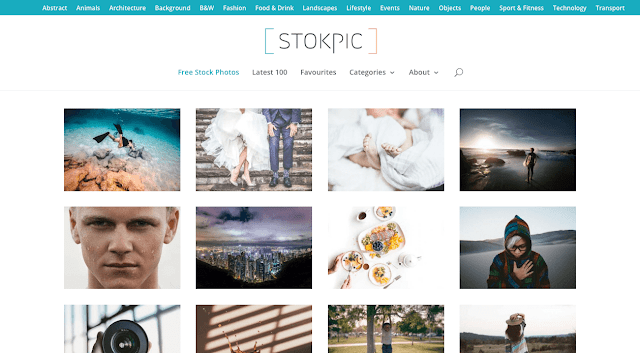
Stokpic is another example of a photographer deciding to give away his photos for free. Ed Gregory decided to share 10 new photos bi-weekly that you can use in any way that suits you.

The easy user interface allows you to browse his categories like architecture, fashion, and nature.

5. Kaboompics


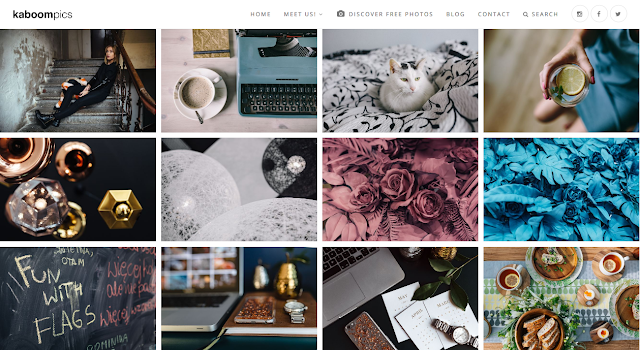
The site's creator, Karolina, is a Polish web designer. She is the creative engine behind this extensive stockpile of high-quality pictures. The images address a wide variety of topics. As with the rest of the sites, users can use Karolina's pictures for anything they need.

A quick visit to the About page of the site shows how big of a reach it has; during our visit to the page, the Image Downloads ticker stood at a whopping 5,051,906.

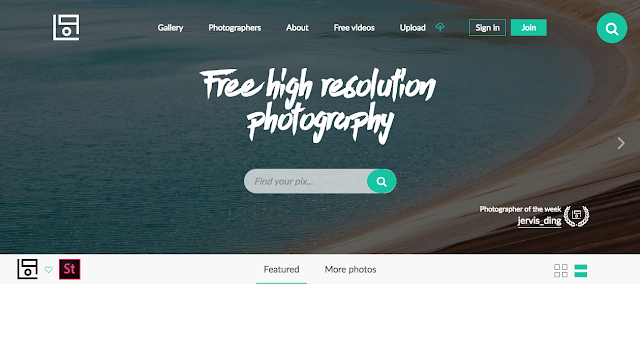
6. Startup Stock Photos

Startup Stock Photos is a company that operates on simplicity. They share pictures they're taking anyway in order to help businesses find a cheaper way to gain traction online.

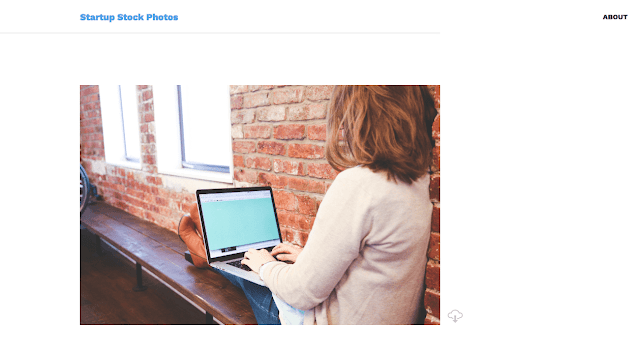
You don't have to be a startup business to utilize their images, which is fine by them. The images are free, but they wouldn't say no to a donation.

7. Freerange


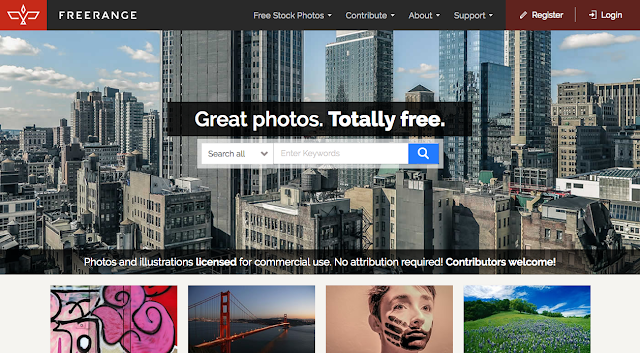
Freerange photos derive from a community of in-house as well as external talent.

At Freerange, their principles and motivations are clear: "Freerange Stock was formed with the goal to provide quality stock photos for commercial and non-commercial use. For free. We feel that free stock photos can be good photos." Can't argue with that.

8. Libreshot


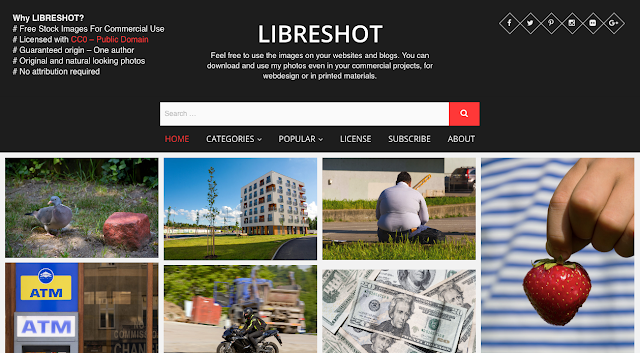
Every photographer brings his/her own unique style to this fun brand of art. At Libreshot lives a very unique collection of free stock photos.

9. Fancy Crave


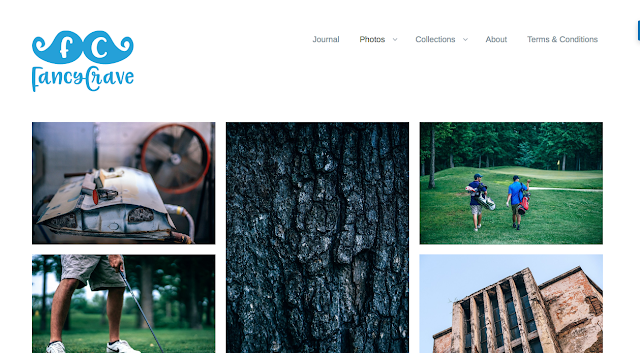
The images on Fancy Crave come without copyright restrictions, and they're free of all the corniness of typical stock photos.

Attribution is not legally required, but they note that it is recommended if possible.

Fancy Craves selects two fresh photos to upload daily, keeping things current and providing beautiful photos to suit all needs.

10. Unsplash


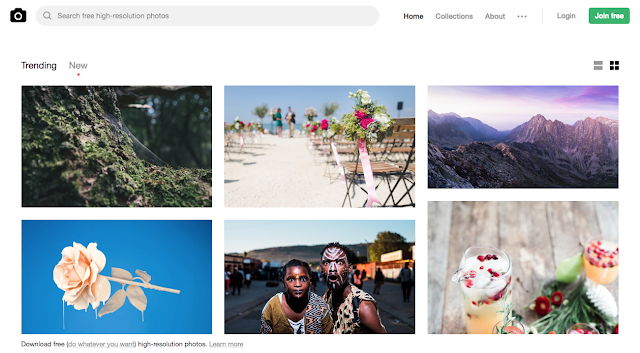
The creativity of the title matches the creativity of their photos. They have pages and pages of quirky, one-of-a-kind images for you to choose from.

As you've likely come to expect, these images are able to be used without any copyright restrictions.

11. StockSnap


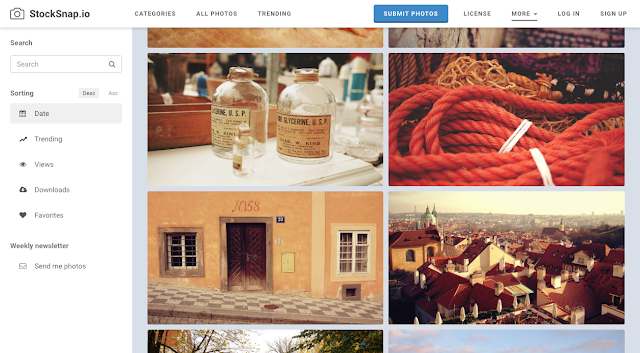
The photos on StockSnap are of superb quality and most of them are especially great for use as backgrounds.

The selection is so interesting and versatile that it's easy to find yourself on page 50 of photos all of a sudden. And yes - they're free.

12. SplitShire


SplitShire is an Italy-based organization that offers pages of incredible free photos for you to use at will. Their philanthropic mission is simply: "Helping you to be awesome out there with great content."

13. Life of Pix

Life of Pix was created by Leeroy Advertising Agency (Montreal, Canada) and they have a real knack for supplying great pictures. Naturally, these cool graphics are fine for you to use - no strings attached.

If pictures aren't enough for your unique project, they have a sister company called Life of Vids.

14. Pexels


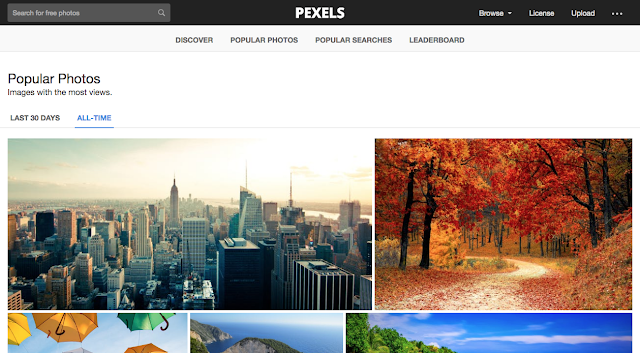
Unlike most of the other listed sites, Pexels handpicks their favorite photos from a pool of free image sources to ensure that you're seeing only top-tier work.

The images that survive their rigorous selection process are then able to be used in any way you see fit. The site also makes searching for your perfect stock photo as easy as possible.

15. HubSpot


HubSpot is a bit different from the rest; there's somewhat of a shortage of high-quality free stock photos available to those who need solely business-themed graphics. Hubspot has a healthy selection of corporate-style images that are perfect for a professional project.

16. Gratisography


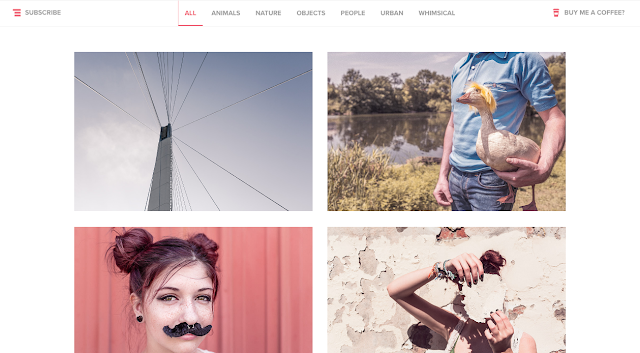
The images on Gratisography lie a little further on the wacky side. These creations come from photographer Ryan McGuire, who is known for seeing things a bit differently. His work is significantly quirkier than some other sites (i.e. fake moustaches, pineapples wearing glasses, gummy bears in cereal) but you never know when you project might just call for something out of the ordinary.

17. Jay Mantri


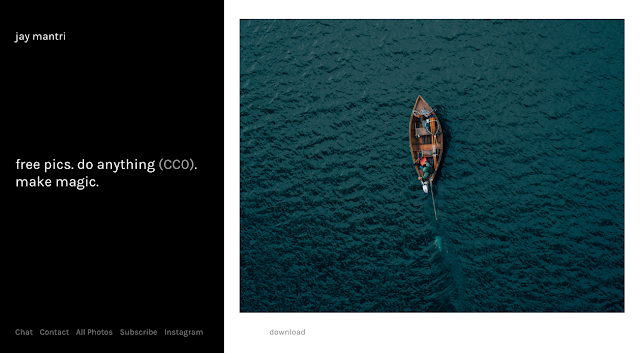
Jay Mantri is yet another good-guy photographer who chose to share his amazing photos with the world. His work is quite sophisticated, and a lot of shots leave you wondering how he did it.

This is one artist we'd say to go check out anyway, even if you don't have a specific need for scenic, high-class images.

18. ISO Republic


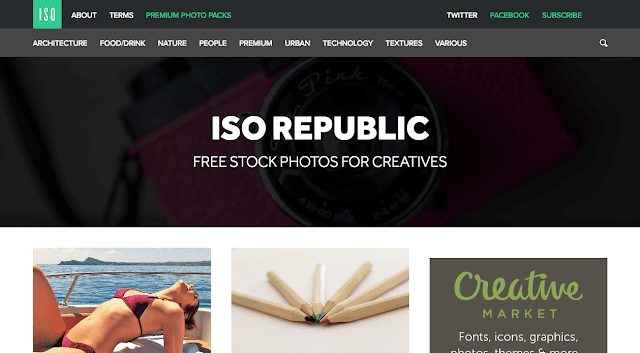
ISO's Republic's mission is to supply only the best digital images for online businesses of all kinds.

One visit to their site will tell you immediately that they are serious about the quality of their content. The photos are top-notch quality, and while the subject matter varies, they all maintain a similar level of sophistication.

Similar to some previously listed sites, you have an option on ISO to register for their email list to get extra content not posted on the site.

19. New Old Stock


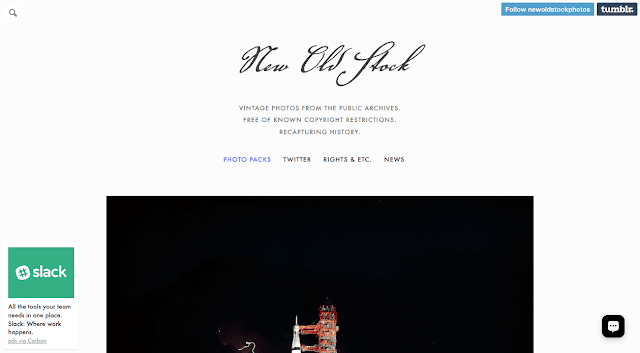
This free stock photo site embodies classic elegance. They deal exclusively in old photos, usually in black and white. Web designers and history buffs alike will enjoy their large compilation of antique photos. Though there are some unique challenges to the redistribution of old pictures, the site only posts those that have no evidence of copyright issues.

Their rules are slightly more stringent than other sites, so just make sure to read up on it before using these photos for commercial purposes.

20. Pixabay


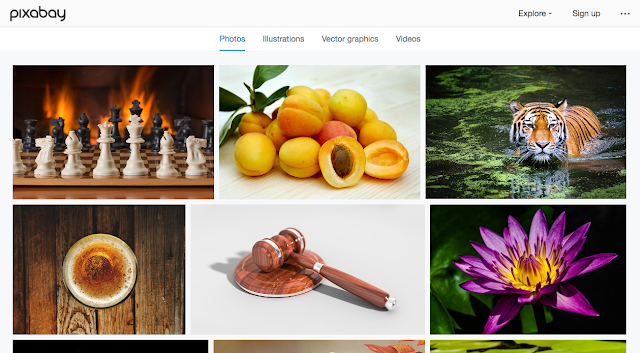
Pixabay is our final choice of free stock photo collection. It has a great archive of plenty of public domain photos (so you can use them without worrying about copyright issues). Thank goodness they have an intuitive search mechanism since they have just shy of a million awesome graphics.

Unlike some other sites, it offers a more advanced search that allows you to filter your query as much as you need so you can always find exactly what you want.

How to Use AdSense Custom Channels to Increase RPM

If you want to boost the AdSense revenue, then you have to try and use all the tools at your disposal to increase the RPM and take your income to new heights. AdSense custom channels are some of the best tools that you can use in this regards. The best thing about these custom channels is that advertisers love them and you can easily adapt them to your needs!

What are AdSense custom channels?

When you hear about Google AdSense custom channels, you will most likely be confused in regards to what they are and what they do. But despite the name that can confuse some people, the reason why they were created is that they offer a really good value for AdSense users. Simply put, these custom channels are designed as a reporting tool, and they enable you to manage your ad inventory without that much of a hassle.

adsense custom channels
You can also use them to turn the ad inventory into a solution that advertisers can target. As a result, you will be able to boost the AdSense revenue in no time. Aside from that, you can also generate a lot of competition for the advertisers. Of course, you do need to have a good amount of traffic to be appealing to the advertisers. But if you use this tool adequately, the overall results can be downright unique. The custom channels are designed to work with a variety of content hubs as well as publishers. But of course, you have to put all your knowledge to the test.

AdSense custom channels A/B testing and analytics

In case you want to boost your revenue with custom channels, you will have to figure out which are the best ads you have, and then you add them into custom channels. You can find the Custom Channels in the Advanced Reports section.


Here you can filter the type of ads you want to track, and you can also view an overview, active views, engagements, clicks and even custom information.

Thanks to the AdSense custom channels, you will get to track things like page performance for that ad, what surrounding content was the best, ad placement results, ad size performance and other relevant info. All these things do add up very well, and they are bound to bring you a unique and distinct set of features.

A/B testing is also easy to do with AdSense custom channels. You track the performance of a text ad against another text ad, or you can opt for a more complex ad test. In fact, you can even make image to text ad comparison if you want. The idea here is to use the power of reports to see which type of ad delivers the best performance.

Depending on your niche, some types of ads will work better when compared to others. So, the idea is to pick the right one that suits your needs. It's the best approach and one that does pay off immensely in the end.

How can you track what blog portion delivers the best revenue?

This is a very good question and a tricky one to answer as well. There are many reasons why you may be unable to answer this adequately. However, it all comes down to a single comparison. For example, you have a site about technology and another one about healthy eating. Both of them are blogs, but the healthy eating one delivers a much better RPM when compared to the technology one.

Obviously, when you do A/B testing and see this, you will most likely focus on creating more healthy eating content and less tech content. But your task is to figure out what went wrong with the technology blog too. You can use the power of AdSense custom channels to figure out what caused that issue. Studying the performance over time will help you see what is wrong and this way you can adapt the situation to your advantage.

Creating a targetable ad inventory with AdSense custom channels

AdSense custom channels offer your online assets to the advertisers so that they can be targeted without a problem. Basically, the companies that have a video ad about their phone repair services will want an ad slot on your phone-related pages, not on the homepage or anything else. The idea is to opt for targeting, and that's where AdSense custom channels excel very well. Besides, advertisers have a limited budget, so they do want to get the very best results from you.

What type of benefits do you get from this? First, you will see that allowing advertiser targeted ads will bring in more competition for ad location and better performing ads. You will also work with advertisers that are knowledgeable and know what they want. Google said they select the best performing ads for your page, so obviously this will help you as well. Plus, advertisers can do smart pricing and earn more money by getting targeted audiences. Simply put, everyone wins with this type of approach, and that's what manages to deliver the very best outcome.

How can you set up AdSense custom channels?

You need to figure out what you want to measure and share to the advertisers. Basically, you create an ad unit, and you can add that to the AdSense custom channels. You can add multiple ones if you want, that is up to you to make the right pick.

Simply put, you go to My Ads in the AdSense console > Content, and then you select Custom channels. Here you will have to press the New Custom Channel Button. Add a name to the custom channel, and then you can select the ad units that you want. It's important to let these ad units targetable; you will have a small option related to targeting under this.

new google adsense custom channel

You can also remove ad placements if necessary. If you want to see the performance, you just need to go to Performance Reports > Advanced Reports > Custom Channels.

How to optimize ad placement channels?

There are some methods you can use to achieve this. Edit some of the best performing channels and as we mentioned above, mark them as targetable. This will offer you a list with some interesting features. You will see the fields that are shown to advertisers. You can also pick where ads appear, and if necessary, the ad location can be for multiple places if you want.

edit adsense custom channel

At this point, you will also need to opt for a description of your website, and you should also tell the advertisers why they should be interested in placing ads on your site. Make sure that you harness all your copywriting power. It's not an easy thing to do, but it may be able to pay off extremely well in the end.

A good idea is not to make all your channels targetable. What you want is to target solely the ones that are valid for you, as that's what will make things shine for sure. It's a very important idea to try and focus on the most important channels at first. If this does work very well for you, then you can adapt it to the most important channels as you see fit.

Keep testing

It's always important to keep testing, because the more you do that, the better the results will end up being for you in the end. AdSense custom channels are designed to be an analytical tool, so it doesn't matter how many channels you have. If you have around 500, that's great, if not, experiment and try to create as many channels as you can.

You shouldn't expect each channel to deliver its best performance. It will take quite a lot of time and effort to adapt everything to suit your needs. But the idea here is that the more you focus on interacting with the audience, the better the results will be for sure. As long as you know how to handle all of this, the experience will be great, and your site will benefit from that.

Plus, you shouldn't expect AdSense custom channels to deliver the best possible value right off the bat. These things do tend to take quite a bit of time for them to work adequately. At first, it may be a bit simple, but as time passes you will see that the results get increasingly better.

The reason is simple, it will just make things a lot better for you, and the AdSense custom channels performance will increase too. Plus, you get to learn what's wrong and opt for what is meaningful. While it can take some time and effort to set up everything adequately, AdSense custom channels do work very well. So, try to create and adapt AdSense custom channels to your needs, then the AdSense RPM will increase exponentially!

How to Create a Blogger Account?

Are you wondering how to create a Blogger account? Many of us do, because Blogger is one of the most popular blogging platforms out there and it can provide us with an extraordinary, fun way to express ourselves in the online world. Not only is it Blogger a very large blogging website, but it's also full of categories that you can blog on. You have complete control over what you want to blog, and that does make Blogger an amazing platform to begin with. Yet you do have to wonder how to create a blog on Blogger! We are here to help you understand all of that and so much more as fast as possible, thanks to a detailed guide that will showcase all the necessary instructions in a very easy to read manner.

Creating a Google account

What you need to know here is that Google owns Blogger, and because of that you will need to use a Google account to sign in to this platform. You can create a Google account now and then you will be able to continue to the platform without a problem. By creating a Google Account you will be able to access a wide range of Google apps and services like Drive or Mail for example. Visit the page above and share all the necessary information in order to create the necessary Google Account. Thankfully, the process is very easy and it will take only a few minutes of your time. In case you already have a Google Account, you will need to sign on the Blogger page.

create a google account

Creating your blog

Once you are located on the Blogger page, you will need to press the New Blog button in order to start a blog. You will receive a new window where you will learn how to create a Blogger account. This will enable you to share all the necessary information.
  • Make sure that you add a title for your blog in the Title area. This is very important because it will allow you to entice the visitor to read more about you and your content. So, try to make the title relevant and appealing
  • In order for users to find your blog, you will need to create an Address for it. Your blog will have a blogspot.com address, but you will need to choose what goes before blogspot.com. Basically, you can opt for something like abcdef.blogspot.com or anything like that. Remember that this can be modified in the long run. The great thing here is that you will immediately be able to see if that address is available or not. This means you will have the ability to check the address availability really fast.
  • The next step will require you to choose from any of the presets that are available at this point. Starting with a Template is a good idea, but do remember that this can be modified afterwards as well. So it's a good idea to just pick a template and move onward.
create a blogger account

Once you have the blog title, address and template ready to go, you will have to press the Create blog! button. This process will take a little bit until it's completed properly, so just wait for a few seconds as the new blog will soon be added to the blog list. So, if you were wondering how to create a blog on Blogger, this is the simplest way to do it.

Maybe the best thing about how to create a Blogger account is that the entire process is very easy to do. Even beginners will have no problem creating and setting up an account. The customization options are plentiful here, so you shouldn't have any problem setting your account really fast!

Starting to post

Although the blog address will be available, you can't call that a blog unless you start writing content in there. Obviously, you will need to learn how to write a post on Blogger, and we are here to help you with that right now.

In order to start writing, you will need to click the Create a new post link or you can press the New Post button. Once you do that, you will gain immediate access to the post editor and here you can write the blog as well as make any necessary changes to content that you already wrote.

create new blogger post

Write a title for your post

Your post needs to have a title. Towards the top of the Blogger editor you will see that there is a Post title box. Add in the desired post title there. This shouldn't eat up a lot of your time, just try to come up with a post title that is enticing, very easy to use and a delight to read for your audience. A catchy title can be great. Don't opt for the clickbait title that you can see nowadays, make your title feel informative and fun to read as that's what you want. If you want to write a first post, you need to make it introductory. Write about the goals you have, the type of content you want to add and so on. It will not be easy to write down the first words, but if you create a good title it will be easier for you to translate thoughts into words!

create blogger post title

Start the writing process

You can create a Blogger post in 2 ways. You can either write the post in HTML or you can use the word processor included here. You have a button located in the top left corner which helps you switch between any of these two writing models. The HTML editor helps you create better web content and you can also use it to insert some special web functions. On the other hand, the word processor is more than qualified to offer you all the extra help you might need here.

blogger post compose html

Customizing text

If you want, you will be able to customize the text you want without a problem. You will have the ability to use the toolbar located on top of the editor to modify the text as you see fit. This includes formatting, color, size, alignment and so on. You have a Normal drop-down that helps you change the type of content you want to add, so you should consider changing between the desired heading type as you see fit. This also changes the way search engines process your content, so keep that in mind.  If possible, try to break the content into easy to read pieces. Use the Headings in a strategic manner.

blogger post heading

Add an image to your post

If you want to make your blog post enticing, you should try to add at least an image. These images make posts a lot easier to read and it's a good idea to make the most out of images if you want to share a great experience for your audience. You will have an "Insert Image" button right above your text editor, on the toolbar. There are multiple options, you can either upload them from your PC/Mac, you can share a link or you can use your webcam to take a picture if you want. However, if you link to other websites, make sure that you showcase their copyright or just refrain from doing that to begin with. There are many sites who do not agree with the idea of having their content stolen, so try to stay away from that!

insert image in Blogger post

Modify the post settings

If you look on the right side of your Post Editor, you will be able to access some Post settings. Remember that these make it easy for you to customize your post right before you choose to publish it!

blogger post settings
  • Labels are useful if you want to group multiple posts which are very similar to one another.
  • Schedule allows you to publish your content at a later date. It can come in handy if you don't want to share multiple articles at the same time.
  • Permalink is an option that allows you to select the way your post will be linked to in the future. Usually it will maintain the title structure, but there are other link types you can choose from as well.
  • Location enables you to add a location tag for your post. It's a very good tool for those that move/travel often
  • Options allows you to modify some features like the user ability to comment on a post for example. You can also choose the way your HTML code is interpreted here as well.

Previewing

A great thing about previewing your post is that you will be able to see how it looks when a reader will access it. This is the right time when you need to check your post for any errors, be it grammar or structural ones.

preview blogger post

Save the post for later

This is not the same as scheduling. When you save the post for later, it means that the post just isn't finished at this time and you will continue to work on it at a later time. You can see this as a draft for your future post.

save blogger post

Publishing the post

If you double or triple checked the post and there are no errors, then you are good to go. Still, it's a good idea to go through it at least one more time to ensure that all the content you want is there and you don't have to make any more changes. Add all the necessary labels and tags, make sure that you inserted any links, images and other information that you might need.

Once everything is ready, you will just have to press the Publish button located at the top of the panel. This is when Blogger will automatically redirect you to the Posts page. Here you will see the post right on top.

publish blogger post


Don't believe that your work is done at this point. In fact, it's far from that. You still have a long way to go before you properly optimize and improve your blog. After all, people won't be drawn in to your blog if you have just a single one to begin with. Work hard to write great posts as they will be able to make your blog stand out in the long haul.

Of course, you do need patience. Writing a good blog does require time and you shouldn't rush the content creation. Prioritize quality over quantity all the time. If you don't do that, the experience will be very well worth it in the end.

How can you expand your blog?

As we mentioned earlier, writing a single post is great but it won't draw in a lot of traffic. If you want to write a good post, one that will bring in lots of readers and views, you want to post as often as possible.

Quality content will always bring in traffic. Update the blog as often as you can. If you can share at least a post per week, you should do that. A good stream of posts will always come in handy, so make sure that you always write some good, enticing content that will help populate your blog.

If possible, we recommend you to create a post Schedule as this will help you better optimize the way you post. This way you will be able to prepare your content beforehand, so you can have it ready when you want to create a new post. The best approach is to write more than 1 post at a time. One can be posted and the others can be kept for a later date if you so desire.

create blogger posts

Write for a niche

Generalized content works but it won't really deliver good results for your audience. If you want to get the best results, we recommend you to find a niche as fast as possible. Not only does a niche help you target specific users, but it will also help you become an authority on that topic. We recommend you to research a niche and become an expert on it. This is the best way to create a large audience for a niche and from here to reaching success in blogging will be just a small step.

Don't rush the content creation process, especially if you write for a niche. Creating redundant content will just keep people away. As long as you take your time and focus on results for your audience, the experience will be an amazing one. Of course, use the proper content structure in order to cater to the needs of search engines, all while maintaining the content relevant for humans as well!

Reader interaction

Once you learn how to create a blog on Blogger you can create more than a blog in order to reach multiple audiences. But the idea here still remains, you will need to interact with the audience. The community will grow more and more as you put out content, so make sure that you always interact with the audience.

Read the comments and moderate them, make sure that you remove spam. Also, reply to people that are interested in what you write. This will help create and nurture a community around your content, which can be very interesting to do!

blogger comments

Advertising your blog

Your blog will need advertising if you want it to grow really fast. One of the best ways you can do that is by sharing it with people anywhere you can. From social networks to social media or any other location, all of these are great places where you can share your blog. We recommend you to try and do the following:
  • Post a short headline and a link to your article on Twitter
  • Single Blogger is a Google Product, make sure that you use the Google buttons in order to share on Google Plus and perform other similar actions.
  • Encourage readers and friends to share your Blogger posts on Facebook and anywhere they can. This will help you reach a large audience really fast.
  • Make sure that you comment on forums and other blogs. Link to your post there if it's meaningful for that particular topic. This type of practice is called backlinking and it's very good for SEO.

Place ads

Ads are very important if you want to monetize the blog. You won't be able to monetize your blog with AdSense unless you have a blog active for around 6 months, so keep that in mind. You also need to have at least 18 years of age and you also have to obey the TOS. AdSense allows you to receive payments based on the amount of impressions generated by your blog.

sign up for AdSense

Blog customization

You can modify just about anything you want on Blogger, it all comes down to you to make the right changes! For example, you will be able to press Layout and then you can modify the block content for each section of your blog. You also have the ability to Add a Gadget if you want. Blogger has lots of add-ons to choose from, all of which can help you better define your blog!

If you want to customize your Template, keep in mind that there are multiple customization options to choose from. You can also keep the template you have now. Programmers can press the Edit HTML button so they can modify the CSS and HTML code.

blogger template edit HTML

Stat tracking

Blogger has a dedicated option named Stats where you have the ability to monitor the blog performance. Here you have the ability to see the amount of views you get. This way you can identify what posts are performing better than others. As a result, you know what content works great for your audience in the longer term!

Learning how to create a Blogger account is really easy and you can feel free to create multiple blogs if you want. Just make sure that you write content for all of them. Plus, you can also monetize each one of your blogs if you so desire. Take your time and make sure that you provide valid information for your readers. This should be the main reason to create a Blogger account in the first place!

How to Get a Disabled Gmail Account Back

It can be a frustrating experience when you find your Gmail account is no longer active. Having your Gmail account disabled means losing access to the products by Google that were linked. There are several reasons why your account may have been ended that are mostly due to the Terms of Service policies by Google itself. So, if you have violated one more of the polices either intentionally or not, you can find yourself with a disabled Gmail account.

Adding to the frustration is that Google will often disable the account with no warning. However, the good news is that there are simple methods for getting your account back online.

Gmail Account Temporarily Disabled

This is generally the easiest to overcome as Google believes that your account may be compromised. To rectify the situation, you will be asked to provide your mobile number or recover email identification. If you do either, they will send you a text message that will allow you to access your account quickly. You will need to do so within a 48-hour period otherwise it will become more difficult to get back your account.

Gmail Account Disabled Due To Perceived ToS Violation

If your Gmail account disabled included a terms of service (ToS) violation warning, then you will need to fill out their contact form so the process of getting your Gmail account back can begin. You should read the ToS thoroughly so that the violation will not happen again and provide the email address. If you do not get a response, repeat the step every two days until you do.

gmail account disabled
Gmail account disabled - Google contact form screenshot

Once they have responded, the next step should be to get your Gmail back so that you can gain automatic access to all the Google products including AdSense. You can also visit the help forum where you can open a 'Gmail account disabled' topic. Just focus on the Gmail account itself first as that is the key to the rest of your Google services. You'll want to discuss the issues that you are facing and why this needs to be resolved as quickly as possible. If the Top Contributor pings your thread to the staff at Google, then you should expect your account to be back online in 48 hours or two business days.

Gmail Account Disabled Due To Serious ToS Violations

If the Gmail account disabled was due to a serious violation of the Terms of Service agreement, as well as the Google policies that oversee your account, then you will have considerable difficulty in getting your account back. Such violations would include your AdSense account being involved in click fraud, for example. Serious violations that are clear will make it virtually impossible for your account to be restored.

If what happened was not considered a serious violation, then you should be able to get your account up and running within 24 to 48 hours depending on the circumstances. It pays however, to keep all your important data and information outside of your Google accounts in case of getting a Gmail account disabled result. By protecting yourself, the impact will be easier to handle until you can get your account back online.

5 Best Custom Blogger Contact Form Widgets

In the past, adding a custom contact form for Blogger was quite a complex process, and many bloggers were forced to use third party websites. However, even after Blogger launched its own contact form gadget, it was still considered as highly inadequate. This is because the official gadget would only be implemented on the footer the sidebar. Most bloggers preferred having a separate blogger contact form placed on its own page to make their blogs appear well arranged and more professional as well.

Having a well laid-out Blogger contact form is very important. This is the tool that visitors, companies, and brands can use to contact you and it is simply a must-have feature for every blogger. If you are not comfortable with sharing your main email address directly on your blog, then a custom Blogger contact form offers an effective way in which people can easily reach you.
5 Best Custom Blogger Contact Form Widgets

Why you should use a Blogger Contact Form?

If you are still stuck on third party providers, you should definitely consider switching to the official custom contact form for Blogger since it has various unique benefits, like:
  • Messages are delivered immediately - As the blog administrator, you will receive a message immediately the visitor clicks send.
  • Reliable - It is the official form developed by Blogger, which makes it more trustworthy and reliable way to initiate contact as compared to using third-party services.
  • Questions - The contact form offers a platform for your visitors to ask specific questions that they might have regarding the blog you wrote or your business in general. It can be an excellent way of capturing leads and even lead to conversions if you are selling a certain product or service.
  • Feedback - Visitors can easily comment on your blog by leaving their feedback through your contact form. This feedback can help you determine which post to do next or what areas to address based on the visitors' comments.
  • Information or service request - For those who are using the blog as a way of marketing a product or service, potential clients can use the custom contact form for Blogger to reach out and request additional information.

How to Add Blogger Contact Form Gadget

Before adding a custom Blogger contact form to a static page, we need to add the default contact form in the blog's sidebar to make it functional:

1. Log into your Blogger dashboard and go to "Layout" > click on the "Add a gadget" link on the page elements area.

2. Select "More Gadgets" below the "Basics" tab and click the "+" button to add the Contact Form Gadget.

blogger contact form

Hiding Blogger Contact Form from the Sidebar

Once the contact form has been added, next step is to hide it so that it will appear only in the static page.

1. Go to "Template" and press the "Edit HTML" button. Once the code editor opens, click anywhere inside the code area and press CTRL + F keys (or Command + F for mac) to open the search box.

2. Type or paste the following tag inside the search box and hit Enter to find it:
]]></b:skin>
3. Just above the ]]></b:skin> tag, add this CSS code:
#ContactForm1{display: none !important;}
4. Click the "Save template" button on the upper left side and view your blog. The contact form widget should be gone.

Adding Custom Blogger Contact Form in a Static Page

Finally, now that we enabled the functionality of the contact form, let's add a custom contact form in our Blogger blog...

1. Go to "Pages" and click the "New page" button. If you already have a Contact us page, just click the "Edit" link below the page title.

2. Once the Page editor opens, fill up the page title with Contact/Contact Us or any title you want to show. It is recommended doing this before anything in order to make the permalink SEO friendly.

3. Click on the HTML tab as there we will add the code to make the custom Blogger contact form work. On the right site, change the Page settings to hide ("Don't allow" or "Don't allow, hide existing") the reader comments, then click the "Done" button:

contact static page

4. Below are 5 custom Blogger contact form styles. Pick your favorite and copy the code provided, then paste the code inside the HTML box of your page editor:


Simple Contact Form

custom blogger contact form

<style type="text/css">
.contact-form-widget{margin-left:auto;margin-right:auto;width:600px;max-width:100%;padding:40px 0}.contactf-name,.contactf-email{float:left;width:48.25%}.contactf-name{margin-right:3.5%}.contact-form-name,.contact-form-email,.contact-form-email-message,.contact-form-name:hover,.contact-form-name:focus,.contact-form-email:hover,.contact-form-email:focus,.contact-form-email-message:hover,.contact-form-email-message:focus{width:100%;max-width:100%;margin:0 0 20px;padding:10px 15px;font-size:12px;letter-spacing:1px;color:#444;background:#F3F3F3;border:medium none;-webkit-box-shadow:none;-moz-box-shadow:none;box-shadow:none}.contact-form-name,.contact-form-email{height:37px}.contact-form-email-message{height:170px}.contact-form-button-submit,.contact-form-button-submit:hover{width:13%;height:30px;font:normal 12px Arial;letter-spacing:1px;color:#444;display:block;outline:none;margin-bottom:20px;text-align:center;background:#E6E6E6;border:0;cursor:pointer}.contact-form-button-submit:active{outline:none;-webkit-box-shadow:none;box-shadow:none}.contact-form-cross{border:medium none!important;box-shadow:none!important;padding:0!important;height:11px !important;width:11px !important;}
</style>

<div class="widget ContactForm" id="ContactForm22"><div class="contact-form-widget"><div class="form"><form name="contact-form"><div class="contactf-name"><input class="contact-form-name" id="ContactForm1_contact-form-name" name="name" size="30" type="text" value="NAME" onblur='if (this.value == "") {this.value = "NAME";}' onfocus='if (this.value == "NAME") {this.value = "";}'  /></div><div class="contactf-email"><input class="contact-form-email" id="ContactForm1_contact-form-email" name="email" size="30" type="text" value="EMAIL" onblur='if (this.value == "") {this.value = "EMAIL";}' onfocus='if (this.value == "EMAIL") {this.value = "";}'/></div><div style="clear:both"></div><div class="contactf-message"><textarea class="contact-form-email-message" cols="25" id="ContactForm1_contact-form-email-message" name="email-message" rows="5" value="MESSAGE" onblur='if (this.value == "") {this.value = "MESSAGE";}' onfocus='if (this.value == "MESSAGE") {this.value = "";}'></textarea></div><input class="contact-form-button contact-form-button-submit" id="ContactForm1_contact-form-submit" type="button" value="SEND" /><div class="contact-form-error-message" id="ContactForm1_contact-form-error-message"></div><div class="contact-form-success-message" id="ContactForm1_contact-form-success-message"></div></form></div></div></div>

Contact form with CSS rainbow divider

colorful contact form for Blogger

<style type="text/css">
.contact-form-widget{margin-left:auto;margin-right:auto;width:600px;max-width:100%;padding:0}hr{position:relative;height:.75em;border:0;overflow:hidden;margin:0}hr:before{content:"";display:block;position:absolute;top:0;left:0;height:.75em;width:5.1em;background:#C4DD83;box-shadow:5em 0 0 0 #F4FCC9,10em 0 0 0 #FDCD78,15em 0 0 0 #ED786F,20em 0 0 0 #D99DBF,25em 0 0 0 #C39EDC,30em 0 0 0 #679DE2,35em 0 0 0 #62C2E3,40em 0 0 0 #F4FCC9,45em 0 0 0 #FDCD78,50em 0 0 0 #ED786F,55em 0 0 0 #D99DBF,60em 0 0 0 #C39EDC}.contactf-name,.contactf-email{float:left;width:49.25%}.contactf-name{margin-right:1.5%}.contact-form-name,.contact-form-email,.contact-form-email-message,.contact-form-name:hover,.contact-form-name:focus,.contact-form-email:hover,.contact-form-email:focus,.contact-form-email-message:hover,.contact-form-email-message:focus{width:100%;max-width:100%;margin:25px 0 0;padding:10px;font-size:15px;color:#ccc;border-color:#E8E8E8;border-width:2px 2px 4px;-webkit-box-shadow:none;-moz-box-shadow:none;box-shadow:none}.contact-form-name,.contact-form-email{height:40px}.contact-form-email-message{height:100px}.contact-form-button-submit,.contact-form-button-submit:hover{margin-top:25px;width:100%;height:40px;font-size:15px;color:#fff;text-align:center;text-shadow:0 1px 2px rgba(0,0,0,0.25);background:#EE786F;border:0;border-bottom:2px solid #D4685C;outline:none;cursor:pointer;-webkit-box-shadow:inset 0 -2px #D4685C;box-shadow:inset 0 -2px #D4685C}.contact-form-button-submit:active{top:1px;outline:none;-webkit-box-shadow:none;box-shadow:none}.contact-form-cross{border:medium none !important;box-shadow:none !important;padding:0 !important;height:11px !important;width:11px !important;}
</style>
<div class="widget ContactForm" id="ContactForm22"><div class="contact-form-widget"><hr><div class="form"><form name="contact-form"><div class="contactf-name"><input class="contact-form-name" id="ContactForm1_contact-form-name" name="Name" size="30" type="text" value="Name" onblur='if (this.value == "") {this.value = "Name";}' onfocus='if (this.value == "Name") {this.value = "";}'/></div><div class="contactf-email"><input class="contact-form-email" id="ContactForm1_contact-form-email" name="E-mail address" size="30" type="text" value="E-mail address" onblur='if (this.value == "") {this.value = "E-mail address";}' onfocus='if (this.value == "E-mail address") {this.value = "";}'/></div><div style="clear:both"></div><div class="contactf-message"><textarea class="contact-form-email-message" cols="25" id="ContactForm1_contact-form-email-message" name="Type your message here..." rows="5" type="text" value="Type your message here..." onblur='if (this.value == "") {this.value = "Type your message here...";}' onfocus='if (this.value == "Type your message here...") {this.value = "";}'></textarea><input class="contact-form-button contact-form-button-submit" id="ContactForm1_contact-form-submit" type="button" value="Send Message" /><div class="contact-form-error-message" id="ContactForm1_contact-form-error-message"></div><div class="contact-form-success-message" id="ContactForm1_contact-form-success-message"></div></div></form></div></div></div>

Blogger Contact Form with CSS Ribbon

contact form with ribbon

<style type="text/css">
.widget.ContactForm{z-index:1}.contact-form-widget{margin-left:auto;margin-right:auto;width:600px;max-width:100%;padding:25px 0;background:#EBEBE3;-webkit-border-radius:2%;-moz-border-radius:2%;border-radius:2%}.contact-form-widget .form{width:91%;margin:0 auto}.ribbon{font:16px Arial;text-transform:capitalize;text-shadow:0 1px 2px rgba(0,0,0,0.25);position:relative;background:#6B5F53;color:#fff;text-align:center;padding:1em 2em;margin:0 -16px}.ribbon:before,.ribbon:after{content:"";position:absolute;display:block;bottom:-1em;border:1.5em solid #584C40;z-index:-1}.ribbon:before{left:-1.7em;border-right-width:1.2em;border-left-color:transparent}.ribbon:after{right:-1.7em;border-left-width:1.2em;border-right-color:transparent}.ribbon .ribbon-content:before,.ribbon .ribbon-content:after{content:"";position:absolute;display:block;border-style:solid;border-color:#42362A transparent transparent;bottom:-1em}.ribbon .ribbon-content:before{left:0;border-width:1em 0 0 1em}.ribbon .ribbon-content:after{right:0;border-width:1em 1em 0 0}.contactf-name,.contactf-email,.contactf-message{text-align:left;margin-top:25px;color:#a1937b;font-size:13px}.contactf-name,.contactf-email{float:left;width:100%}.contact-form-name,.contact-form-email,.contact-form-email-message,.contact-form-name:hover,.contact-form-name:focus,.contact-form-email:hover,.contact-form-email:focus,.contact-form-email-message:hover,.contact-form-email-message:focus{width:100%;max-width:100%;margin:10px 0 0;padding:10px;font-size:12px;color:#aaa;border-color:#DBD6D1;border-width:1px;box-shadow:none;-webkit-border-radius:5px;-moz-border-radius:5px;border-radius:5px}.contact-form-name,.contact-form-email{height:35px}.contact-form-email-message{height:100px}.contact-form-button-submit,.contact-form-button-submit:hover{margin-top:25px;width:100%;height:37px;font:normal 12px Arial;outline:none;letter-spacing:1px;color:#fff;text-align:center;cursor:pointer;text-shadow:1px 1px 0 #ffe8b2;color:#7c5d1b;border:1px solid #d6a437;background:#febd4b;background:-webkit-gradient(linear,0 0,0 100%,from(#fed970) to(#febd4b));background:-webkit-linear-gradient(#fed970,#febd4b);background:-moz-linear-gradient(#fed970,#febd4b);background:-ms-linear-gradient(#fed970,#febd4b);background:-o-linear-gradient(#fed970,#febd4b);background:linear-gradient(#fed970,#febd4b);-pie-background:linear-gradient(#fed970,#febd4b)}.contact-form-button-submit:active{color:#7c5d1b;border:1px solid #d6a437;background:#febd4b;background:-webkit-gradient(linear,0 0,0 100%,from(#febd4b) to(#fed970));background:-webkit-linear-gradient(#febd4b,#fed970);background:-moz-linear-gradient(#febd4b,#fed970);background:-ms-linear-gradient(#febd4b,#fed970);background:-o-linear-gradient(#febd4b,#fed970);background:linear-gradient(#febd4b,#fed970);-pie-background:linear-gradient(#febd4b,#fed970)}.contact-form-cross{border:medium none!important;box-shadow:none!important;padding:0!important;height:11px !important;width:11px !important;}
</style>
<div class="widget ContactForm" id="ContactForm22"><div class="contact-form-widget"><h2 class="ribbon"><strong class="ribbon-content">Shoot Me an Email</strong></h2><div class="form"><form name="contact-form"><div class="contactf-name">Your name:<input class="contact-form-name" id="ContactForm1_contact-form-name" name="Name" size="30" type="text" value="Name" onblur='if (this.value == "") {this.value = "Name";}' onfocus='if (this.value == "Name") {this.value = "";}'  /></div><div class="contactf-email">E-mail address *:<input class="contact-form-email" id="ContactForm1_contact-form-email" name="E-mail address" size="30" type="text" value="E-mail address" onblur='if (this.value == "") {this.value = "E-mail address";}' onfocus='if (this.value == "E-mail address") {this.value = "";}'/></div><div style="clear:both"></div><div class="contactf-message">Message *:<textarea class="contact-form-email-message" cols="25" id="ContactForm1_contact-form-email-message" name="Type your message here..." rows="5" value="" placeholder="Type your message here..." value="Type your message here..." onblur='if (this.value == "") {this.value = "Type your message here...";}' onfocus='if (this.value == "Type your message here...") {this.value = "";}'></textarea><input class="contact-form-button contact-form-button-submit" id="ContactForm1_contact-form-submit" type="button" value="SEND MESSAGE" /><div class="contact-form-error-message" id="ContactForm1_contact-form-error-message"></div><div class="contact-form-success-message" id="ContactForm1_contact-form-success-message"></div></div></form></div></div></div>

Minimal Contact Form

minimal contact form for Blogger

<style type="text/css">
.contact-form-widget{margin-left:auto;margin-right:auto;width:600px;max-width:100%;padding:25px;background:#fff}.contact-title{text-align:center;font:41px fantasy;color:#121212;margin-bottom:25px}.contactf-name,.contactf-email{float:left;width:47%}.contactf-name{margin-right:6%}.name-icon img,.email-icon img{background:transparent!important;border:medium none!important;box-shadow:none!important;padding:11px 0!important;width:16px !important;height:16px !important;}.name-icon,.email-icon{position:absolute;z-index:1}.contact-form-name,.contact-form-email,.contact-form-email-message,.contact-form-name:hover,.contact-form-name:focus,.contact-form-email:hover,.contact-form-email:focus,.contact-form-email-message:hover,.contact-form-email-message:focus{width:100%;max-width:100%;margin:0 0 25px;padding:10px 10px 10px 25px;font:bold 16px cursive;text-shadow:0 1px 2px #ddd;color:#121212;background:transparent!important;border-color:#121212;border-width:0 0 2.5px;-webkit-box-shadow:none;-moz-box-shadow:none;box-shadow:none}.contact-form-name,.contact-form-email{height:40px}.contact-form-email-message,.contact-form-email-message:hover,.contact-form-email-message:focus{padding:10px!important}.contact-form-email-message{height:150px;border-width:2.5px!important}.contact-form-button-submit,.contact-form-button-submit:hover{background:#121212!important;width:30%;height:37px;font:bold 13px "Lucida Grande";letter-spacing:2px;color:#fff;text-align:center;border:medium none;cursor:pointer;display:block;margin:0 auto;outline:none}.contact-form-cross{border:medium none!important;box-shadow:none!important;padding:0!important;width:11px !important;height:11px !important;}
</style>
<div class="widget ContactForm" id="ContactForm22"><div class="contact-form-widget"><h2 class="contact-title">Get in touch.</h2><div class="form"><form name="contact-form"><div class="contactf-name"><div class="name-icon"><img src="https://blogger.googleusercontent.com/img/b/R29vZ2xl/AVvXsEg9GrhCYmaLUqLV6IuV4FElrI1Bz9owLRhm7xKUv6vfXEBG7jjOiOuwo_7UP_x0gfr3HXFFAkk2BLWwt6vqnfu0JXEJJIlBLBcdStfagYTAzvhquOnh9MfUuVDP726Vm21Xc9ta2JaKIVtd/s1600/avatar%25281%2529.png" width="16" height="16" /></div><input class="contact-form-name" id="ContactForm1_contact-form-name" name="Name" size="30" type="text" value="Name" onblur='if (this.value == "") {this.value = "Name";}' onfocus='if (this.value == "Name") {this.value = "";}'  /></div><div class="contactf-email"><div class="email-icon"><img src="https://blogger.googleusercontent.com/img/b/R29vZ2xl/AVvXsEjbfkWvPOy0iD_5N7ywmKxaKyS6SxbzxGGp2udx2ZkUaqWgyKitVSRxEJB6lAS6jLl8-FNEmsUIQn57PQjfLiSuWp8WDlLplVXq089Yaxj0a_yALiCaHTqdZq-hvP5GezBaN-qlzeeEWKw5/s1600/envelope%25281%2529.png" width="16" height="16" /></div><input class="contact-form-email" id="ContactForm1_contact-form-email" name="E-mail address" size="30" type="text" value="E-mail address" onblur='if (this.value == "") {this.value = "E-mail address";}' onfocus='if (this.value == "E-mail address") {this.value = "";}'/></div><div style="clear:both"></div><div class="contactf-message"><textarea class="contact-form-email-message" cols="25" id="ContactForm1_contact-form-email-message" name="Type your message here..." rows="5" value="Type your message here..." onblur='if (this.value == "") {this.value = "Type your message here...";}' onfocus='if (this.value == "Type your message here...") {this.value = "";}'></textarea><input class="contact-form-button contact-form-button-submit" id="ContactForm1_contact-form-submit" type="button" value="SEND" /><div class="contact-form-error-message" id="ContactForm1_contact-form-error-message"></div><div class="contact-form-success-message" id="ContactForm1_contact-form-success-message"></div></div></form></div></div></div>

Contact form with speech bubble


<style type="text/css">
.contact-form-widget{margin-left:auto;margin-right:auto;width:600px;max-width:100%}.contactf-name,.contactf-email{float:left;width:50%}.contact-form-name,.contact-form-email,.contact-form-email-message,.contact-form-name:hover,.contact-form-name:focus,.contact-form-email:hover,.contact-form-email:focus,.contact-form-email-message:hover,.contact-form-email-message:focus{width:100%;max-width:100%;margin:0 0 15px;padding:10px;font-size:14px;color:#777;background:#E2DEDB;border:1px solid #CBC7C4;-webkit-box-shadow:none;-moz-box-shadow:none;box-shadow:none;-webkit-border-radius:20px;-moz-border-radius:20px;border-radius:20px}.contact-form-name,.contact-form-email{height:33px}.contact-form-email-message{height:130px}.contactf-message{position:relative}.contactf-message:after,.contactf-message:before{border-bottom:50px solid transparent;border-left:80px solid #E2DEDB;bottom:-32px;content:'';position:absolute;right:50%;margin-right:-100px}.contactf-message:before{border-left:80px solid #CBC7C4;bottom:-34px;right:50.3%;margin-right:-101px}.cbluebutton{margin-top:25px;width:30%;height:35px;float:right;font-size:15px;color:#fff;display:inline-block;text-align:center;background:linear-gradient(to bottom,#339ad9 0%,#224bbc 100%);box-shadow:0 1px 1px rgba(34,75,188,0.5);border:0;-webkit-border-radius:20px;-moz-border-radius:20px;border-radius:20px}.cbluebutton span .contact-form-button-submit{background:linear-gradient(to bottom,#52b1e2 0%,#397fd0 100%);font:bold 16px "Helvetica Neue",sans-serif;height:35px;width:100%;color:#FFF;text-shadow:0 1px 1px #224BBC;display:inline-block;box-shadow:0 1px 1px rgba(255,255,255,0.3) inset;cursor:pointer;outline:none;-webkit-border-radius:20px;-moz-border-radius:20px;border-radius:20px}.contact-form-button-submit:active{top:1px;outline:none;-webkit-box-shadow:none;box-shadow:none}.contact-form-cross{border:medium none!important;box-shadow:none!important;padding:0!important;width:11px !important;height:11px !important;}
</style>
<div class="widget ContactForm" id="ContactForm22"><div class="contact-form-widget"><div class="form"><form name="contact-form"><div class="contactf-message"><textarea class="contact-form-email-message" cols="25" id="ContactForm1_contact-form-email-message" name="Message" rows="5" value="Message" onblur='if (this.value == "") {this.value = "Message";}' onfocus='if (this.value == "Message") {this.value = "";}'></textarea></div><div class="cbluebutton"><span><input class="contact-form-button contact-form-button-submit" id="ContactForm1_contact-form-submit" type="button" value="Send" /></span></div><div class="contactf-name"><input class="contact-form-name" id="ContactForm1_contact-form-name" name="name" size="30" type="text" value="Name" onblur='if (this.value == "") {this.value = "Name";}' onfocus='if (this.value == "Name") {this.value = "";}'  /></div><div class="contactf-email"><input class="contact-form-email" id="ContactForm1_contact-form-email" name="email" size="30" type="text" value="E-mail" onblur='if (this.value == "") {this.value = "E-mail";}' onfocus='if (this.value == "E-mail") {this.value = "";}'/></div><div style="clear:both"></div><div class="contact-form-error-message" id="ContactForm1_contact-form-error-message"></div><div class="contact-form-success-message" id="ContactForm1_contact-form-success-message"></div></div></form></div></div>

5. After you added the code, click the "Publish" button on the upper right side. Now you should be able to see the Blogger contact form live on your static page. To ensure that everything works fine, you can send a message as a test. The message should be delivered to your inbox in a matter of seconds, just make sure that you're checking the email that you're using with your Blogger account.

Frequently Asked Questions about the Custom Contact Form for Blogger

Where do the messages go?

Once a visitor asks a question or sends feedback through the Blogger contact form, it is instantly delivered to the email associated with your Blogger account. If a blog has several administrators, then all the individual administrators will receive the comments or questions asked by the visitor.

What is the benefit of using a separate "Contact Us" page?

Even though it all comes down to your personal preferences, your blog will look more professional if it has a separate page for the custom contact form for Blogger. It gives you credibility and also offers you the chance to add a specific call to action in the new "Contact Us" page.

Is it possible to add extra fields?

Unfortunately, no. You can't add custom fields such as website, phone number or mailing address since Blogger uses special tags in order to transfer data. In any case, the default fields are well laid-out and will help you to get the basic information you need about your visitors.

I have installed the Blogger contact form, but it is not working. What could be the problem?

There are several reasons why you may be having trouble setting up your contact form. The simplest way to troubleshoot is to countercheck the email you linked to the blog and also reinstall the form again.

Ultimately, by using the custom Blogger contact form you gain from consistency in the type of information you request and also reduce spam since you will not have to display your email directly on the blog.

Top 10 Killer Tips to Improve Page Rank

Page rank is based on an algorithm that determines how close your link is to the query that was put into a search engine such as Google. The more important your link is shown to be, the higher it will be ranked on search results pages. The result is that web traffic increases to the links that are ranked at or near the top.

How the Page Rank is Calculated?

The calculations used by the algorithm that determines page rank includes the number of links that are connected to your site. That includes inbound, internal, external, do-follow, and no-follow links along with backlinks. To increase your web traffic, you need to improve page rank so that it pulls in more people who are likely to purchase the products or services that you offer.

Here are 10 killer ways to improve page ranking so that more people will start visiting your website.

How to Improve Page Rank?


improve page rank

Submit Site to Web Directories

A simple, but very effective way to increase web traffic is adding more high quality backlinks. This can be done simply by submitting the content to respected web or article directories. They provide a great way for more people to see your content. Some good directories include the following:
By finding the right articles and web directories, you can quickly improve your page rank for your content.

Post Regularly

Google like sites that post on a regular basis, so set up a schedule where you have new, fresh content for your site on a daily or weekly basis. Be sure to post on the same day or days each week which will help improve your overall ranking.

Improve Content

If the content is well written, informative, and unique, this will help increase the chance that readers will share it with others. The better the content is presented, the more likely it is to be shared and that will improve its page ranking.

Link Exchange

This is a well-known technique, but it still works. To get a higher page rank, you will need to get other sites that are ranked higher to link to your site. Therefore, you will automatically have good links that will help boost the ranking of your content. This means that you will need to appeal to those with higher ranked sites to agree to share their link with you.

Post on Other Sites

This is also called guest posting, it is another tried-and-true technique that helps you improve page rank. Find blogs that allow for guests to post so that you can receive two or three backlinks in return for what you have submitted. The key is to post on blogs that are in your industry or niche so that you can attract readers to your site.

Add Comments to Other Sites

In addition to posting articles, you should also comment regularly on articles posted on other sites. You will need to set up a schedule so that you can comment on a consistent basis on posts that are in your niche or industry. The more you post, the more active you are in the community which means that more your site will grow in status. While most sites today have Disqus installed which means that a link to your site is automatically posted, others still use the Do-Follow which means you will need to include the link.

Increase Uptime

Be sure that you choose a web host that offers 99.9% uptime so that your website is available to anyone who wants to visit. Long downtimes can significantly cut into your web traffic, so be sure to choose a provider that is reliable and provides guarantees about uptime.

Social Bookmark

The social network is a great way to help increase the visibility of your content and improve page rank as well. By sharing your content on the best social sites, you will get more traffic thanks to the free backlink. Naturally, you’ll want to choose sites that are quite popular like the following;
  • Facebook
  • Google Plus
  • Pinterest
  • Reddit
  • Stumble Upon
  • Digg
  • Delicious
By sharing with good social media sites, you can increase page rank considerably. Plus, it will work for you over time to help bolster your site. Plus, be sure to be active on your social media sites by responding to questions so that potential customers will stay close to your efforts.

Multiple Pages

This is another old, but useful technique that can improve your page rank thanks to internal linking. Basically, you will need multiple pages that you link together for articles or content that is similar in nature. It takes a little work, but it is well worth it to see the results over time.

Research Popular Keywords

Focus on keywords that are the most common which means using words that people are most likely to use as queries on search engine sites. By using the most commonly searched keywords, you can help boost your page ranking significantly over time. This means having more visitors and better results when it comes to your sales.

In addition to these ten proven ways to improve page rank, you should also consider the power of advertising. By creating a simple banner and advertising with it on other sites, you can generate a lot of good backlinks which in turn creates more traffic for your page. Keep in mind that you should be active daily when it comes to blogs and forums that are in your niche as well.

Another small trick is to add a link to your signature in forums and emails, although you’ll want to avoid any illegal tactics that will put your website into trouble. By using proper techniques, you can improve page rank naturally which builds for your long-term success. After all, your goal is to be successful by increasing the ranking of your content. So, you should put in the time and effort to do things right to succeed.

Which methods do you use to improve page rank? Share with us in a comment below.